Lab 10 - Deploy Gloo Gateway
Solo.io’s Gloo Gateway is a cloud-native API gateway and ingress controller that provides secure and scalable traffic management for microservices, hybrid, and multi-cloud environments. It supports advanced features like traffic routing, load balancing, security, and observability, enabling efficient and reliable service-to-service communication. Gloo Gateway, while designed to integrate with service meshes, can also provide compatibility with other cloud-native technologies running as VMs (such as EC2 instances) or functions (such as Lambda), offering flexibility and extensibility for modern application architectures.
In this lab, we will install the enterprise version of Gloo Gateway. If you don’t have access to a trial license key, you will still be able to complete the next lab, but for the JWT use case, you will need a license.
-
Define variables based on the environment: Your instructor will provide you with the Gloo Gateway License key.
AWS_REGION=<your AWS Region> GLOO_GATEWAY_LICENSE_KEY=<Gloo Gateway Licence Key> -
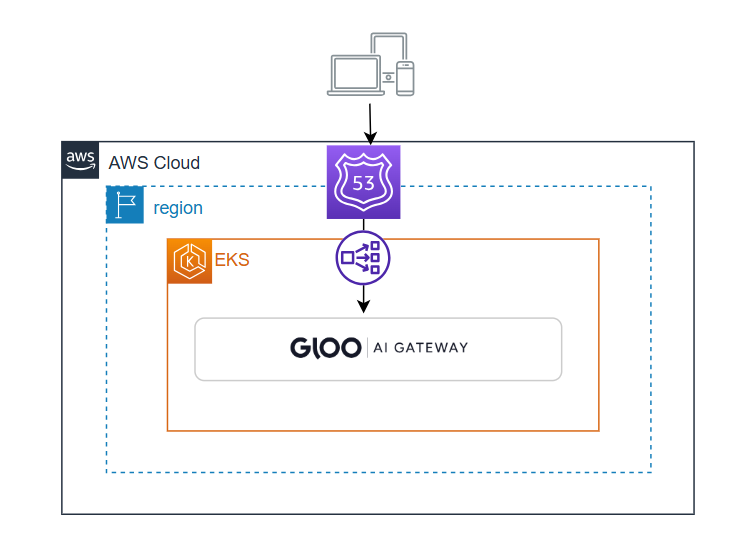
Connect to the AWS EKS Cluster: The pre-prepared environment should have two clusters. While the cluster used in the Gloo Mesh section can be utilized here, we recommend using the second EKS cluster available to you for a clean, distinguished example.
aws eks --region ${AWS_REGION} update-kubeconfig --name solo-io-workshop-cluster-2 -
Install glooctl: This is the Gloo Gateway command line tool for managing Gloo Gateway components, describing configured resources, and more.
curl -sL https://run.solo.io/gloo/install | GLOO_VERSION=v1.16.12 sh - export PATH=$HOME/.gloo/bin:$PATH -
Install Gloo Gateway: Use the command line tool from the previous step. We will disable observability components that would require storage to efficiently use lab resources.
glooctl install gateway enterprise --license-key=$GLOO_GATEWAY_LICENSE_KEY --values - <<EOF observability: enabled: false prometheus: enabled: false grafana: defaultInstallationEnabled: false EOF -
Wait 2-3 minutes for all components to install.
kubectl get pods -n gloo-system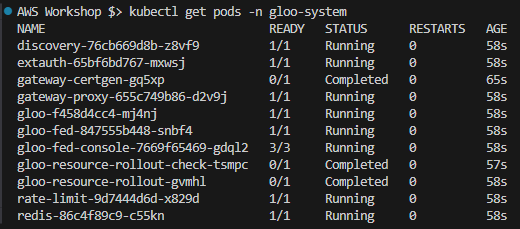
Note: You can also enable the Gloo Gateway GUI by executing one of the command below and accessing it using http://localhost:8090.
# For localhost access you can use glooctl
glooctl dashboard

# if you run commands on remote station kubectl allows access to be more open
kubectl port-forward -n gloo-system svc/gloo-fed-console  8090:8090 --address 0.0.0.0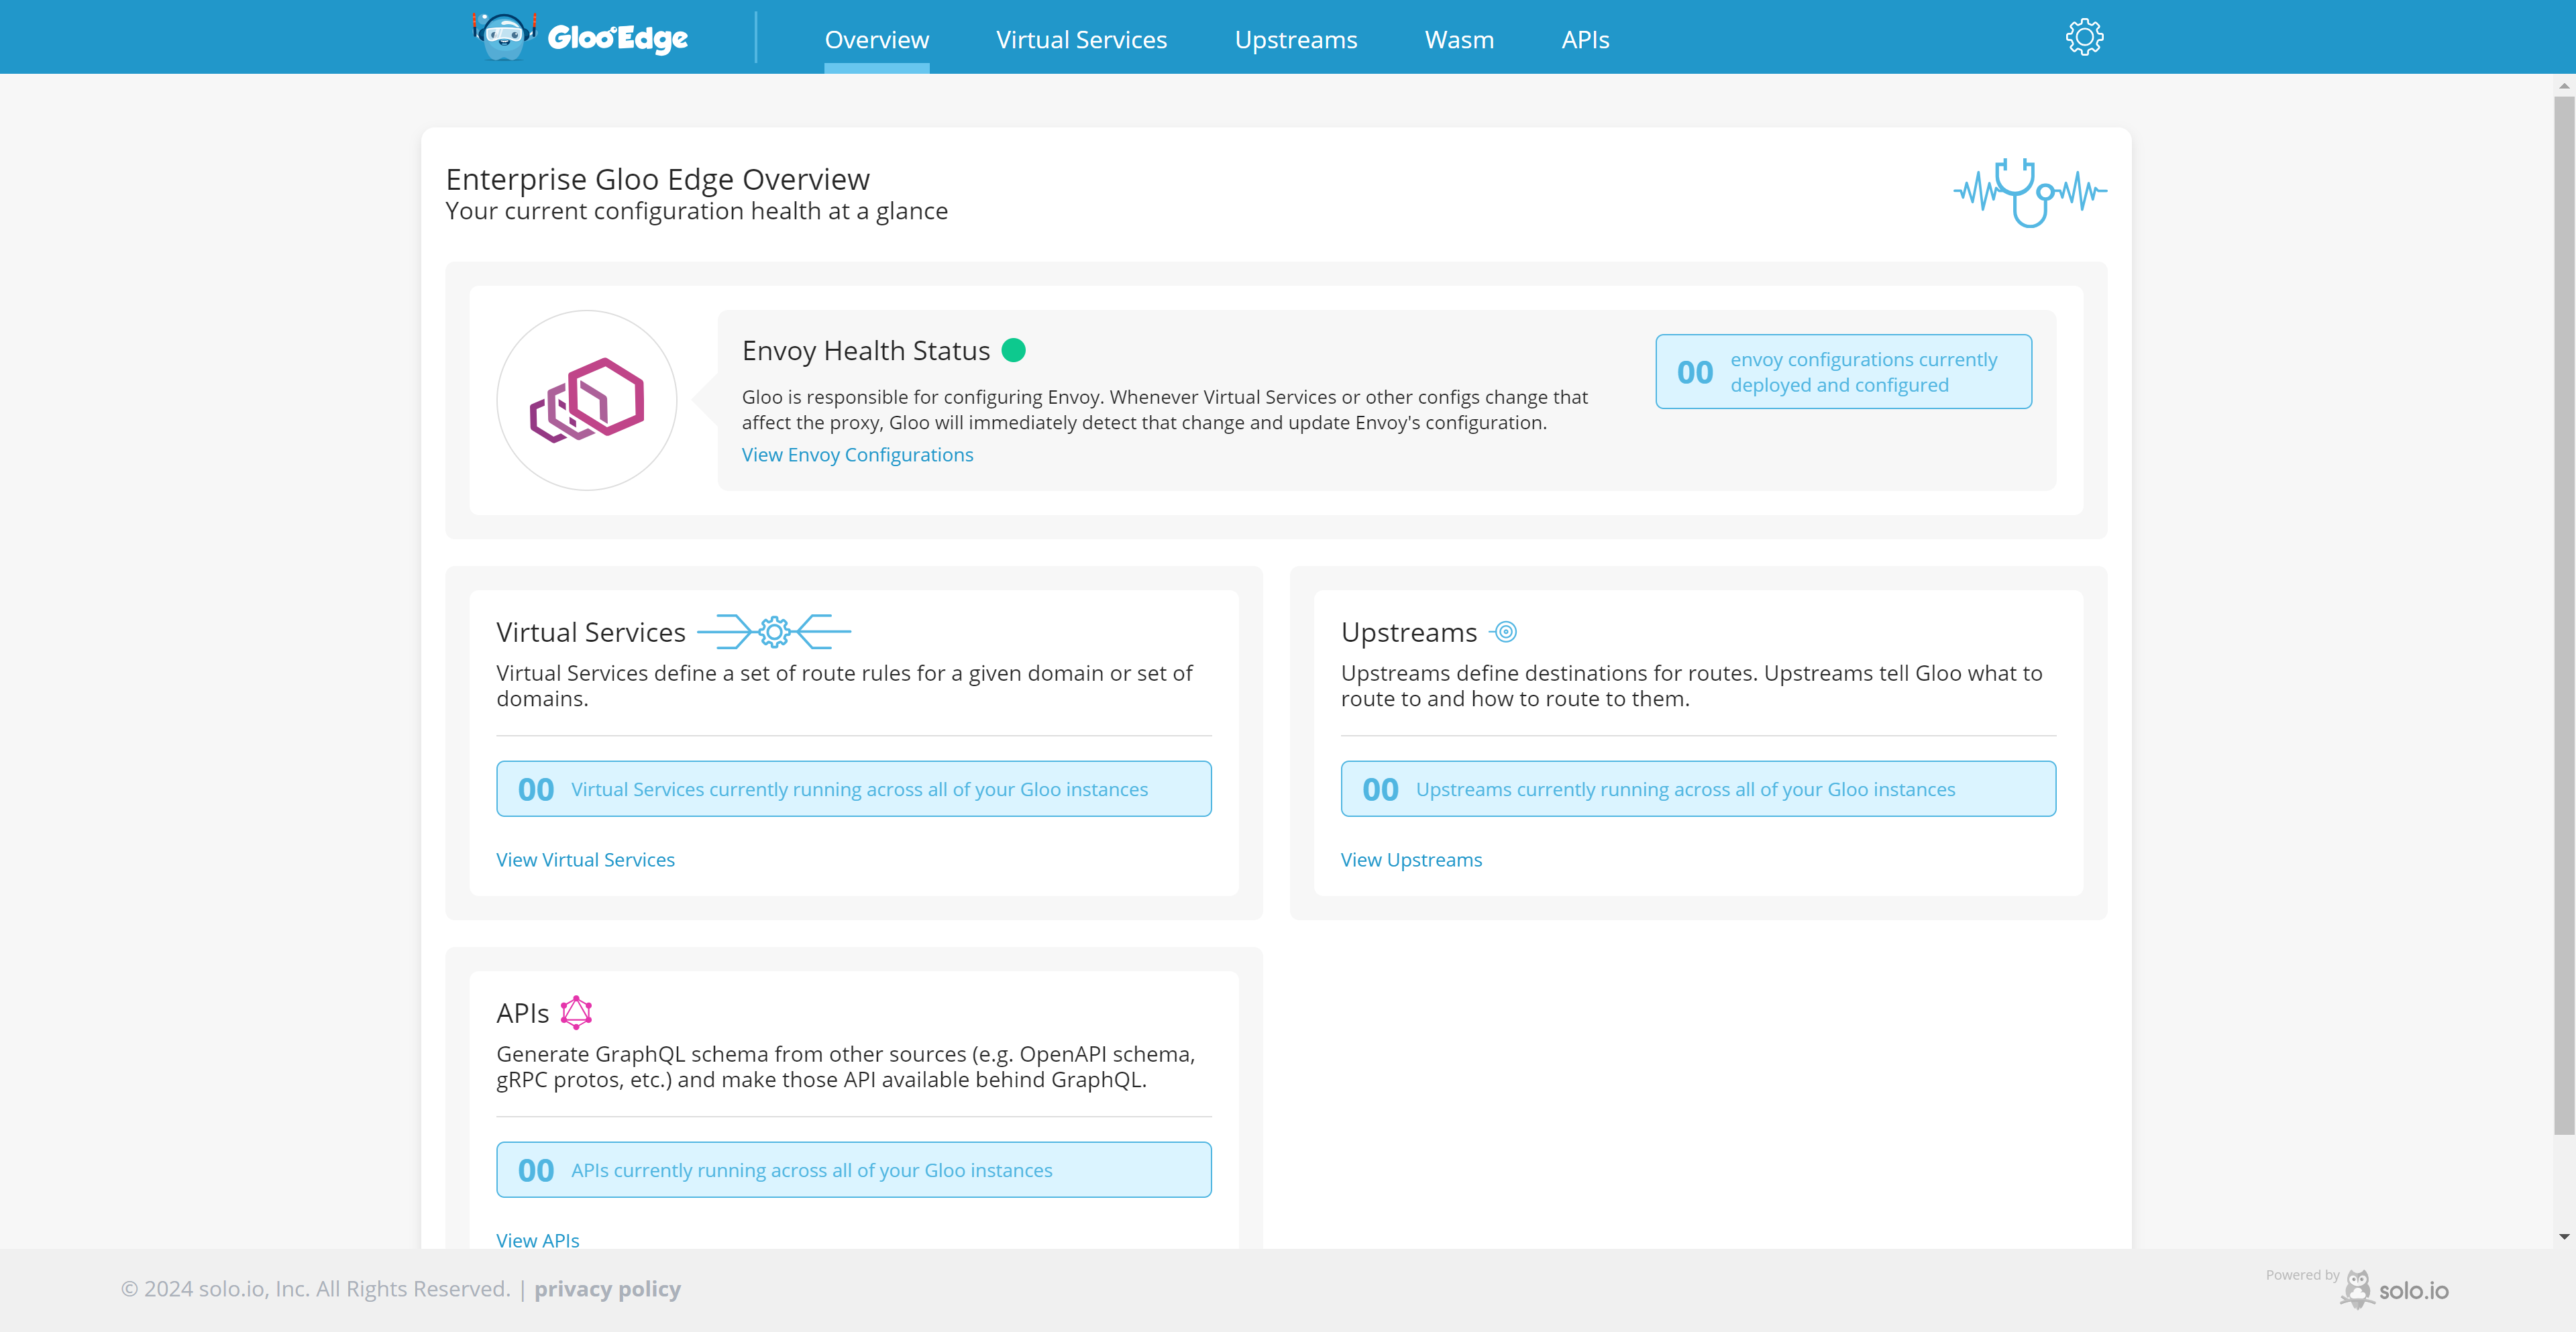
-
Wait for the Gloo AI Gateway Service to become ready and set its IP address to a variable for us to use later:
export GLOO_GATEWAY=$(kubectl -n gloo-system get svc gateway-proxy -o jsonpath='{.status.loadBalancer.ingress[0].*}') printf " Gloo AI Gateway available at http://$GLOO_GATEWAY "Note: The gateway will not respond to any queries until the services are configured.
In this lab, we have successfully set up the Enterprise version of Gloo Gateway. In the next lab, we will focus on setting up an upstream service and providing a token to automatically query the public API Service.