Lab 1 - Deploy Gloo Platform
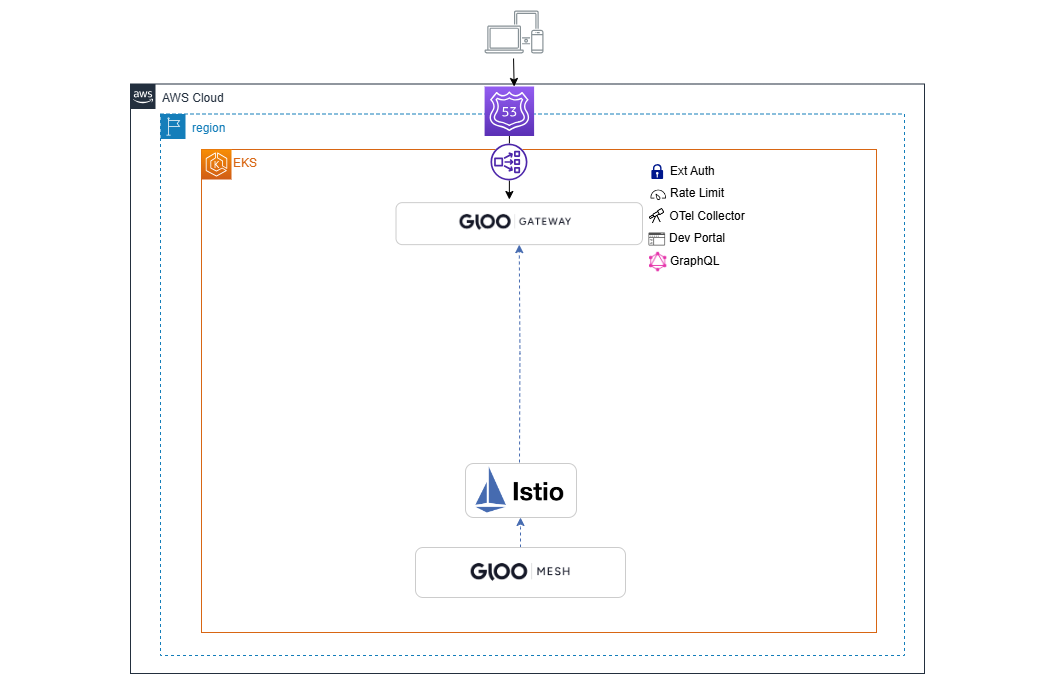
Gloo Platform provides a management plane to interact with the service mesh and gateways in your environment. The management plane exposes a unified API that is multi-tenant and multi-cluster aware. It is responsible for taking your supplied configuration and updating the mesh and gateways in your clusters. Included in the management plane is a UI for policy and traffic observability.
-
Set this environment variable to the Gloo license key.
AWS_REGION=<your AWS Region> export GLOO_PLATFORM_LICENSE_KEY=<licence_key> -
Connect to the AWS EKS Cluster:
aws eks --region ${AWS_REGION} update-kubeconfig --name solo-io-workshop-cluster-1 -
Install meshctl, the Gloo command line tool for bootstrapping Gloo Platform, registering clusters, describing configured resources, and more.
curl -sL https://run.solo.io/meshctl/install | GLOO_MESH_VERSION=v2.5.4 sh - export PATH=$HOME/.gloo-mesh/bin:$PATH -
Install Gloo Platform. This command uses profiles to install the control plane components, such as the management server and Prometheus server, and the data plane components, such as the agent, managed Istio service mesh, rate limit server, and external auth server, in your cluster.
meshctl install --profiles gloo-mesh-single,ratelimit,extauth \ --set common.cluster=cluster-1 \ --set licensing.glooMeshLicenseKey=$GLOO_PLATFORM_LICENSE_KEY \ --set demo.manageAddonNamespace=true -
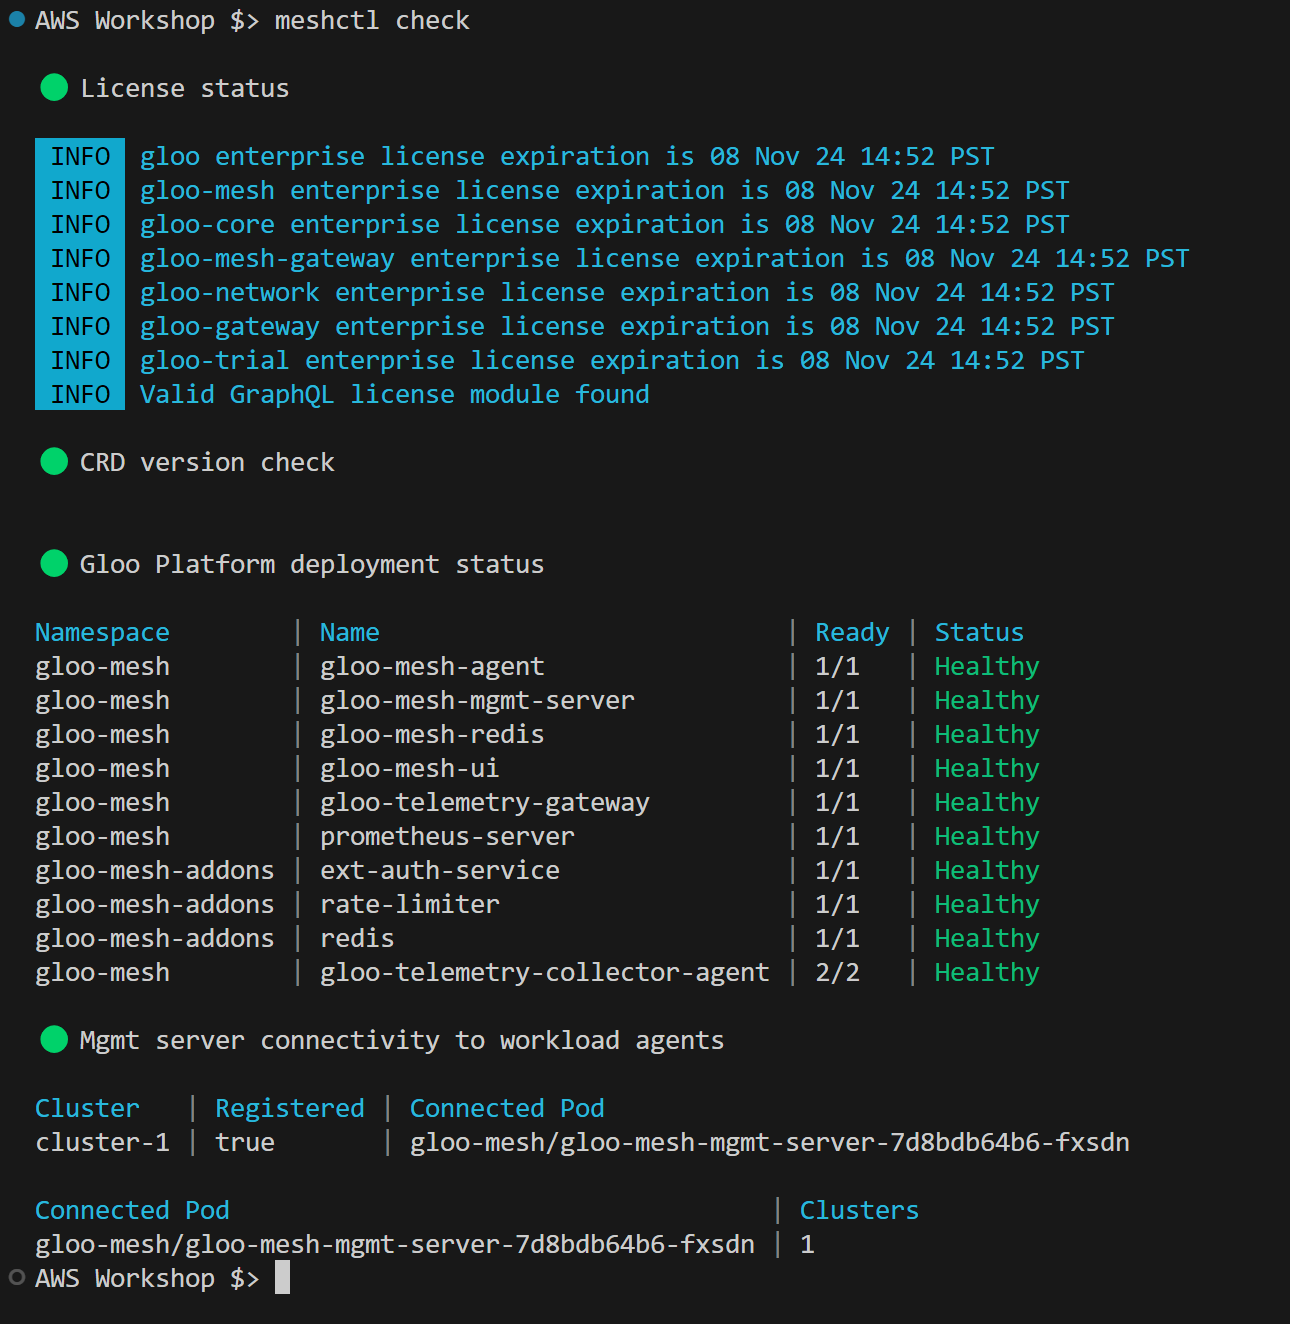
Wait 2-3 minutes for all components to install. Use meshctl check to check the status.
-
Once everything is ready, view the Gloo Platform Dashboard.
# For localhost access you can use meshctl
meshctl dashboard

# if you run commands on remote station kubectl allows access to be more open
kubectl port-forward -n gloo-mesh svc/gloo-mesh-ui 8090:8090 --address 0.0.0.0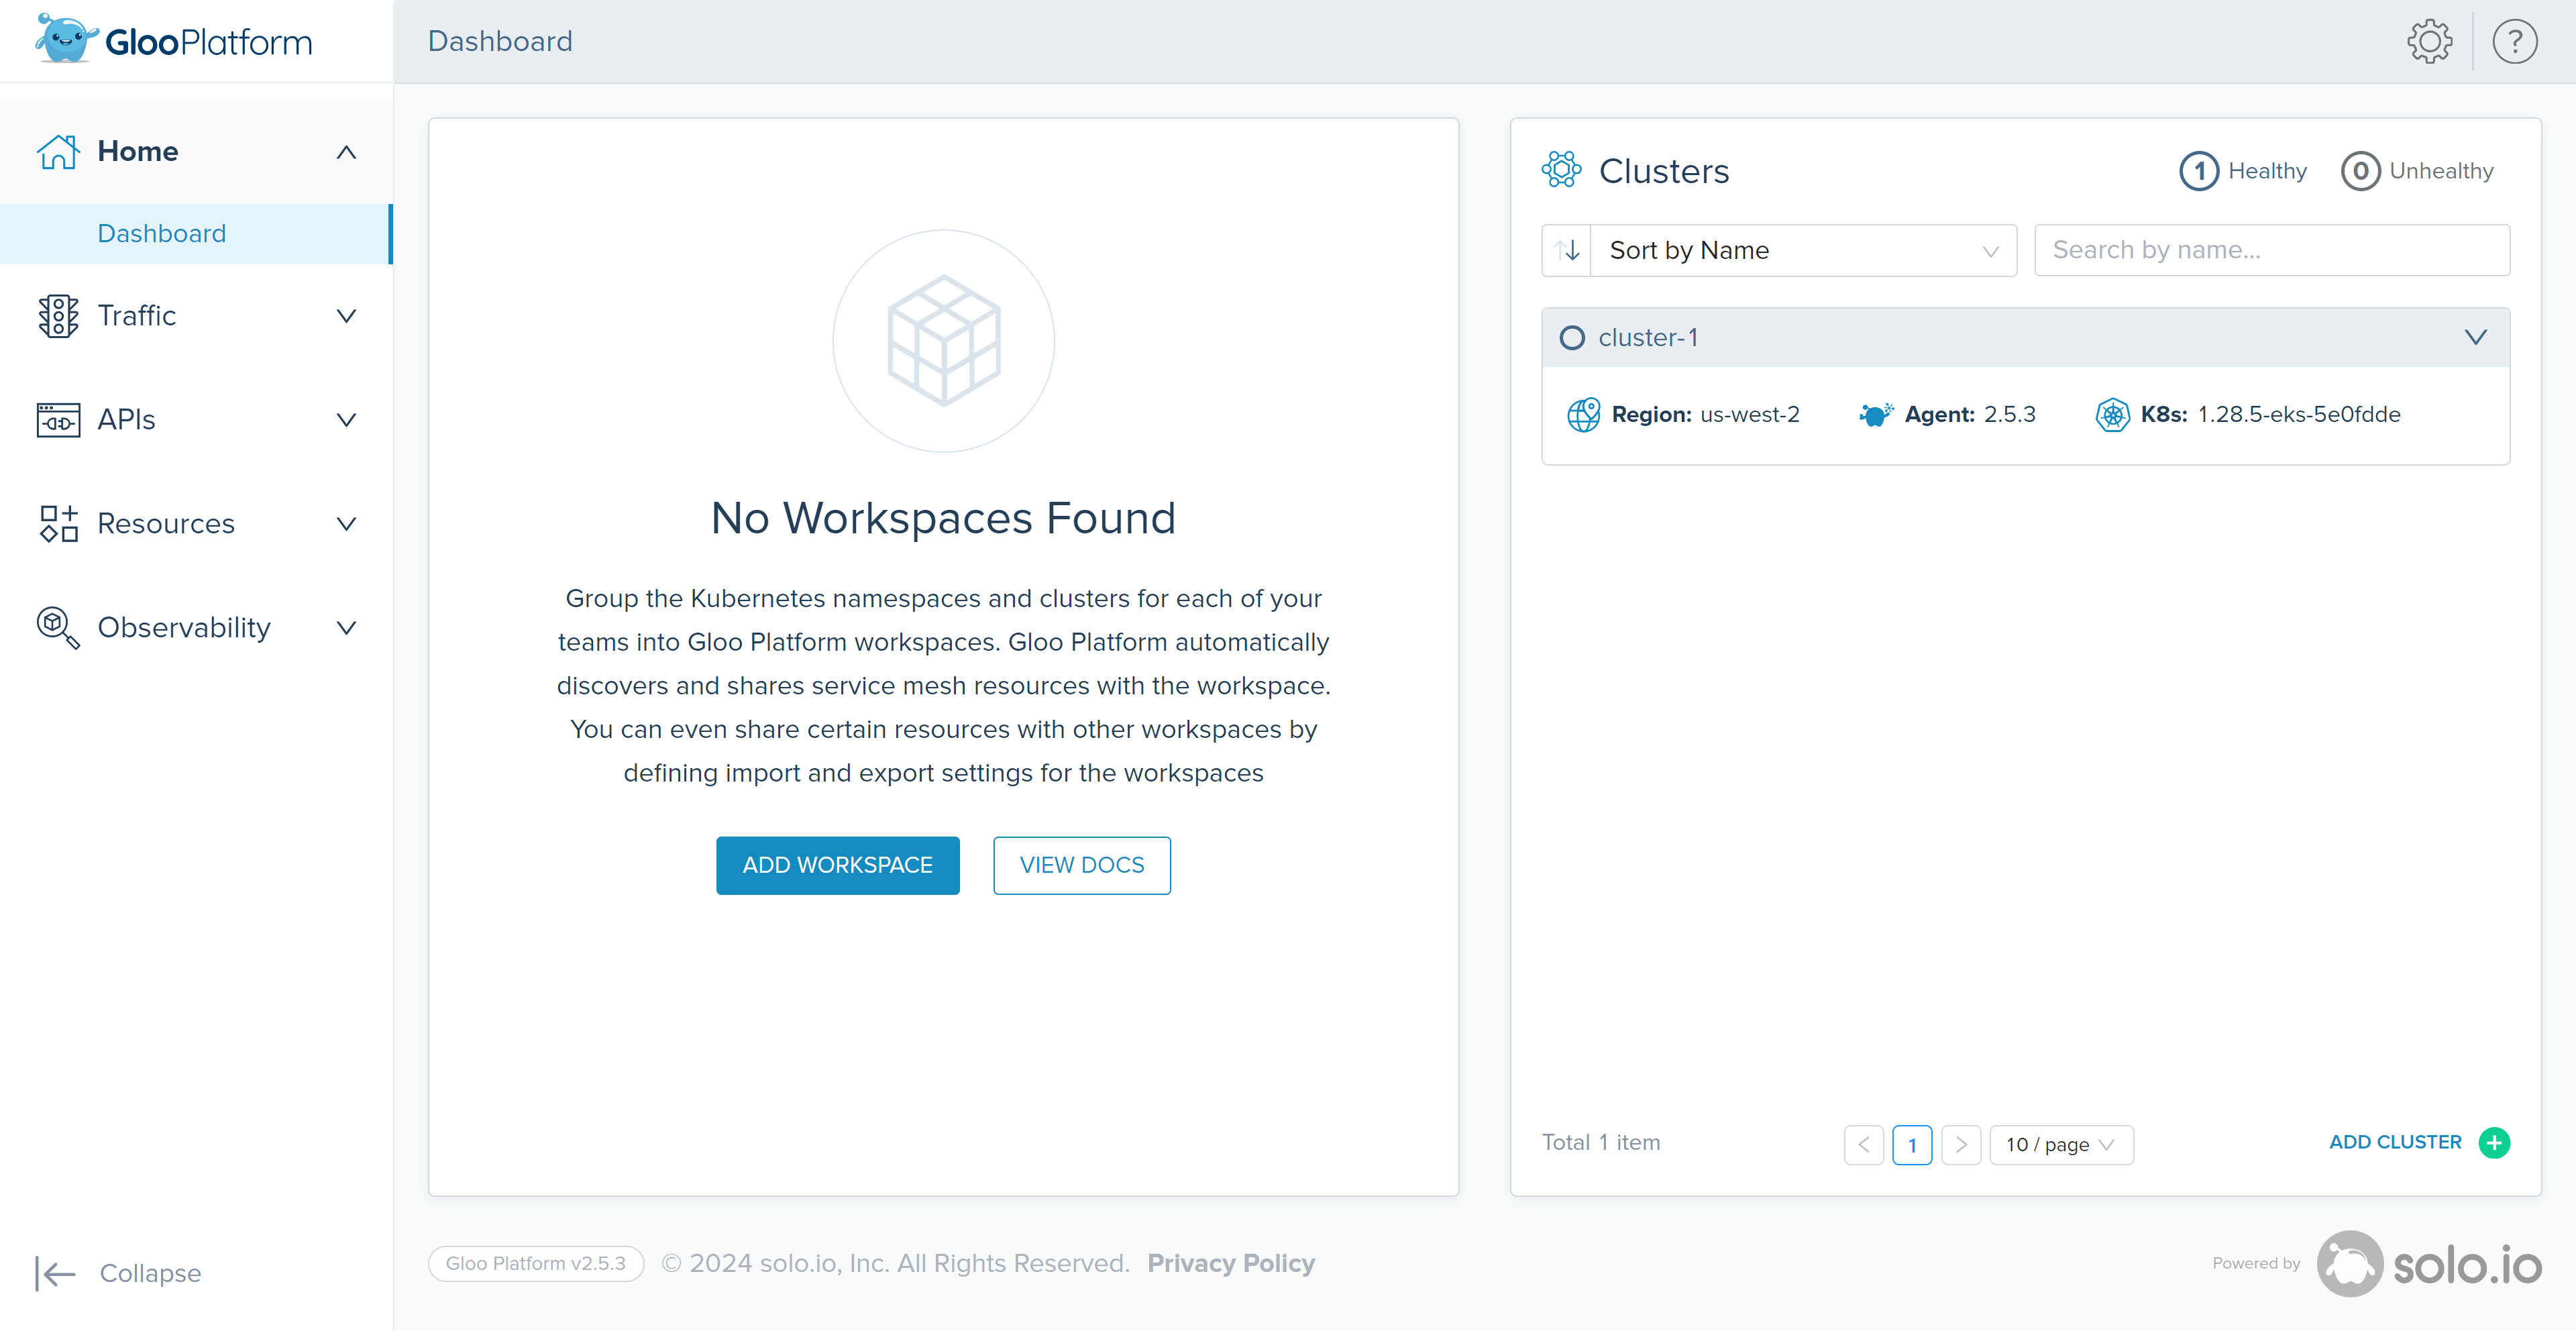
-
As you might have noticed there is no Workspaces created yet. Let’s create a Global Workspace. In the case of this Lab, to simplify the deployment, include all services within the same workspace. This means that they all share the same service discovery policies and security. This is only recommended for the workshop to allow beginners learning Gloo Mesh.
kubectl apply -f - <<EOF apiVersion: admin.gloo.solo.io/v2 kind: Workspace metadata: name: global-workspace namespace: gloo-mesh spec: workloadClusters: - name: '*' # all namespaces in all clusters namespaces: - name: '*' --- apiVersion: admin.gloo.solo.io/v2 kind: WorkspaceSettings metadata: name: global-settings namespace: gloo-mesh spec: exportTo: - workspaces: - name: global-workspace resources: - kind: SERVICE namespace: gloo-mesh-gateways EOF -
Wait for the Gloo Gateway Service to become ready and set its IP address to a variable for us to use later:
export GLOO_GATEWAY=$(kubectl -n gloo-mesh-gateways get svc istio-ingressgateway -o jsonpath='{.status.loadBalancer.ingress[0].*}')
printf "\n\nGloo Gateway available at https://$GLOO_GATEWAY\n"
Note: No application will respond to this address…yet!
In this Lab, we have successfully set up the foundational elements of the Gloo Platform. We’ve installed essential components like the Gloo command line tool, established the Gloo Platform, and created a Global Workspace. This setup paves the way for deploying actual applications and managing their traffic, which will be our focus in the next lab. Remember, the structures we’ve put in place here are crucial for the seamless operation of more complex service mesh architectures that we will explore.
As we transition to the next Lab, we will leverage this infrastructure to deploy and expose a sample application. This will not only demonstrate the practical application of our setup but also introduce us to the real-world scenarios of managing microservices traffic.